Use only alkaline batteries as normal batteries provide unsufficient power.
Operation Manual
Before You start to use this device, please read carefully this operation manual.
The price of this product includes the recycling fee of 0,10 PLN.
Table of contents:
1. Technical specifications ………..…………………………………………………….……3
2. Getting started ……………………………….…….………………………………….…...3
3. Gauge manual ..…...………………………………………………………………….…….4
4. Notifications .……..…………….……………………………………………………….….8
Guarantee …………………………………………………………………………………...10
- Technical specifications
Basic specifications of the device:
- measurement on steel, galvanized steel, aluminium sheets and other by defining
a reference point;
- measurement based on a defined reference point;
- measurement resolution: 1 or 10µm;
- measurement range: from 0µm to 1100µm;
- measurement memory (also after turning the device off): 100 units;
- zeroing function;
- LCD backlight;
- intuitive operation with 7-positions menu;
- automatic shut-off after longer idleness;
- measurement time: 1 - 2 sec;
- measuring sensor diameter: 15 mm;
- powered by 9V alkaline battery (e.g. 6LR61) or corresponding accu;
- power consumption: ~50 mA.
- Getting started
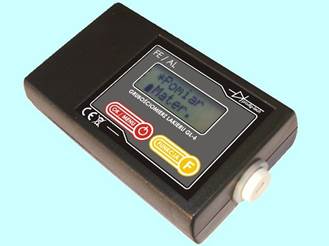
Coating thickness gauge GL-6 is designed to measure the thickness of a steel, galvanized steel or aluminium sheet paint coating. It is also possible to make a measurement based on a defined reference point. The measurement resolution equals 10µm. The device is equipped with an internal EEPROM memory for 100 measurements which enables to check the results after the measurement is made. The memory doesn’t get deleted after turning off the device, although it is possible to delete it from the menu. The device has a LCD backlight which makes measuring in places with insufficient light (e.g. garage) much easier.
Before You start to use the device, please place a new alkaline battery or a fully charged accu in the back side of the device’s housing. In order to do it please take off the battery flap and place correctly the battery or accu by connecting it to the clips on the cable.
WARNING!The device is preset to galvanized steel and aluminium (Zn/Al)! Should the measurement be taken on older cars with non-galvanized steel bodywork, the „Steel” option shall be chosen.
Zeroing (calibration)
Before You start to take measurements, please check whether the gauge is calibrated. To do it properly, please select the „ZERO” function from the main menu and put the sensor against the green side of the calibration sheet. If the display shows a 0 +/-10µm value, it means that the gauge is calibrated. Should the aberration be larger than 0 +/-10µm, please put the sensor once more against the green side of the calibration sheet, wait until the result stabilizes and press the red “OK” button while the sensor still touches the sheet. On the display will appear a „SAVE...” caption and the device will return automatically to the main menu.
If the device is calibrated, You can cancel the “ZERO” function by pressing the red button. Please note not to press the red button before the “------“ caption appears in the second line of the display – otherwise the gauge will decalibrate!
WARNING! While zeroing, the calibration sheet should be placed on a flat, stable non-metalic surface (e.g. do not place the sheet on the bodywork). Also, please avoid holding the sheet in Your hands as this may affect the operation.
Please note that zeroing is worth to be made when the measurement conditions are changing (e.g. the temperature or humidity rises or falls).

ATTENTION!
Use only alkaline batteries as normal batteries provide unsufficient power.